Best Temperature For Growing Microgreens
Choosing the right temperature for growing microgreens can help the plants to produce big yields with a minimal amount of water. Microgreens are like dandelions and need very little attention as long as you plant them properly. You can plant your seeds anywhere but ensure that they receive ample sunshine and moisture so that the sprouts have a chance to develop properly. If you have no sunlight or if you are not planting in the shade, plant your seeds in pots. However, if you do plant in the shade, ensure that your seeds receive the right amount of exposure to the sun in order to grow.
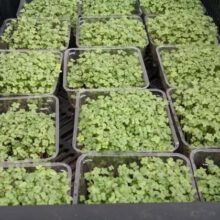
You can choose between three methods of growing microgreens: container, tray, or grow tray. For first-time growers who are not familiar with microgreens, they are similar to spinach, chard or lettuce. They come in two types: hairy and needle-like. To prevent the growth of hairy microgreens, try to use a mesh basket. Place the microgreen inside the basket, cover it with plastic wrap and leave it in a sunny location for about a week.
After about seven days, remove the cover and slice off the sub-irrigated fibrous tissues. Now it’s ready for eating! For eating microgreens, you only need to wash the leafy parts and remove any fibrous strands before cooking or eating. However, be careful about overcooking as the leaves tend to retain much of the nutrients from the original plant. Some recommend eating the leaves raw while others suggest boiling them.
After harvesting the microgreen, plant the clumps in a garden. The clumps should be planted in a shaded area but never alone because the gardener risks burning the leaves. After planting the clumps, use a plastic growing tray so that the microgreens don’t have to be moved during the growing process. During the growing phase, use a standard growing tray but leave some space between the microgreen seeds so they don’t stick to the sides. Place the seed tray inside a potting soil mix.
In order to harvest the seeds from the plants, use a timer. Microgreens need about eight hours of full sunlight during the day and ten hours of minimum light at night. During the blackout period, microgreens need only four hours of full sun and three hours of minimum light. During the growing period, the microgreens need six hours of full sun and six hours of minimum light. It’s important to keep the plants well watered during the blackout period as well.
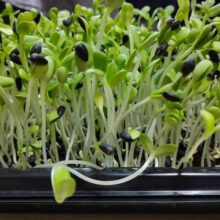
Harvest the microgreens from the plants using a good spray. Make sure you’re harvesting just the seeds from the plant because any leftover leaf debris or dirt from the seedling will be harvested with the seeds. Harvest the seeds from the plant using a sharp knife to separate the larger grains from the smaller seeds. You’ll also want to remove any white blood cells or pus from the small grains.
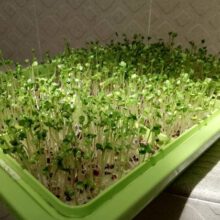
Once you’re sure you’ve removed all unwanted debris and microgreens, you’ll want to put your planting tray inside a grow tray. Using a growing tray will help contain and protect the microgreens during their growing phase. You can purchase pre-made growing trays or buy one of your own. Many people like to customize their growing trays by cutting holes into them or by adding extra trays or layers below it.
During the growing period, the microgreens need to be kept in a dark place. The best place to do this is in a dark room or basement. They should never be grown directly outdoors because the sunlight would dry out the seeds and affect the quality of the finished product. Microgreen seeds should also be stored in a cool dark place. Avoid placing hot pans with cold beverages on them. The blackout period is important because it will limit the number of germinating seeds that survive.