How to Grow Microgreens in Mason Jars
Microgreens are small, orange/red vegetables that have an earthy taste. They come in two varieties: organic and artificial. Many people eat them without knowing how to grow them in mason jars. Here are some tips on how to grow microgreens in Mason jars.
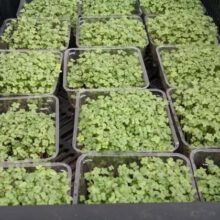
Choose a large-mouth mason jar Do your research to determine what kind of microgreens jar will grow well. Once you know what kinds of microgreens jar will be good to use, choose one with a wide-mouth design. If you use a plain mason jar, place some seeds in the bottom. Place the sliced vegetables on the top of the jar and gently cover the top with the lid of the jar. The microgreens will start to sprout soon after planting.
Prepare the soil When you know how to prepare the soil, mix it with some compost or potting soil. Place the micro green seeds on the top of the soil and then spread on the surface of the soil. Once the seeds are fully planted, lightly mist the top of the soil with water. Allow the water to saturate the soil before you water the jars again.
Place the micro green seedlings in a small amount of water until the seedlings have sprouted enough to easily float on the surface of the water. You may have to do this a few times to get the seedlings to float. Once the seedlings are well-established, place them into a thick plastic mulch. This will keep the roots of the seedlings well-saturated with moisture. Over time, the mulch will help to soak up most of the nutrients from the soil.
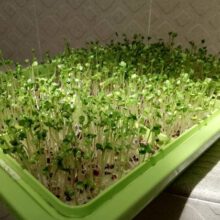
Set up your first batch of hydroponic microgreens In order to ensure good results, plant six to eight individual seeds at one time. These should be placed in small pots made of perforated metal. The pots should have holes drilled on the bottom for the growing medium to drain through. Place the pots in the hole, fill with water and put the light inside the pot. This should provide your plants with the initial nutrient sources they need to grow.
Set your timer for two weeks Set your timer to go on for two weeks straight. Plant the microgreens in three separate containers. Place one in the morning on the second day. It should be the third in the afternoon. Be sure not to over-water the sprouts or the nutrients will wash away.
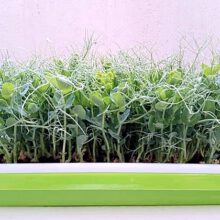
Over the following two weeks, replant the sprouts into their respective containers. Make sure to keep them watered until the last bit of sprouts have developed. When you want to know how to grow microgreens in a mason jar, it is time to transplant them indoors.
Set up a small indoor greenhouse It is possible to establish microgreenhouses this way. It is easy to do and does not require growing light. What you need is a container that contains some loosely packed sand and some perlite as well as a couple of Terra cotta pots filled with sand and a little perlite.
Fill the pots with the compost and cover them. The holes need to be covered with some sand. This will allow the microgreens to grow and if they are placed in the sun they will need light but if placed in the dark they will not. Your goal is to create an environment for your seeds to thrive in.
To encourage the seedlings to develop healthy green shoots, place a few pieces of cuttlebone, cut onion wedges and chives on the bottom of the seed tray. Cover the trays with potting soil and plant some trays per square meter. The idea is to create a support system for the seeds. Microgreen growing systems work very well when used with a true leaf vegetable.
Place a screen over the seedlings to contain the heat generated by the lights and water. This allows the microgreens to have the best chance to grow properly. Once your seeds are well established you can remove the screen and move them to a larger container. Place this inside your greenhouse or container garden.
How to grow microgreens in mason jar material should help you enjoy your crop of fresh vegetables. For planting tips and ideas see below. For fresh broccoli seeds used in this article see below. And thanks for reading.